Proof Presses are top-heavy. For a large press, hire an equipment rigger. Confirm that they are bonded and insured. Consider these recommendations:
- Photograph the press before moving to document its condition.
- Know the weight and dimensions. See Common Models Specs. See also the Other Brands menu.
- Know the dimensions of the new space and the passageways en route.
- Confirm that the pallet jack, dolly, vehicle, trailer, lift gate, and elevator will accommodate the weight.
- If the press is shipped, crate it to prevent forklift damage.
- Secure the carriage at the feed board with ratchet straps so it will not roll during the move. Or secure it at the end of the
- bed to distribute the weight, which may help when moving up a ramp.
- Remove the hand crank by loosening the set screw and extracting the taper pin. Use a pin punch and a heavy hammer.
- Remove or secure the gripper opener cam (e.g., Universal I and 15-21).
- The feed board is easily removed on most models.
- If using a forklift, lift directly under the bed-casting at the feet.
- If lifting in the middle, span with 2×12s to prevent shelves from bending.
- Level the press in its new location.
Removing the Carriage
- Do this only when necessary, such as moving the press up or down a flight of stairs or tipping on end to fit in an elevator.
- Large carriages require an engine hoist (e.g., Universal III, 219 etc.).
- Before removing, make a mark on the side of the teeth of the gear and the gear rack where they mesh, just as the carriage is about to come off the rack. Some presses have multi-section racks (e.g., No. 4, early SP20), which make it easier to index the cylinder when reinstalling.
- Remove the bumpers to allow the carriage to roll off the gear rack.
- Place a sturdy table at the end of the bed to rest the carriage after removal. Build up to the height of the press bed, but make it narrower to allow the carriage bearings, gripper opener lever, and trip rack to overhang.
- Two strong people can lift the carriage off the end of the press.
It may take an additional person to align the carriage when reinstalling. - Be patient; getting the gears to align correctly may take a few tries. When the carriage is at the feed board, the gripper bar on most Vandercook models should be approximately 90°, and the hand crank should point to 4 o’clock (some SP20s point to 2 o’clock)—if not, the carriage was removed at some point. Before 1925, Vandercook hand cranks’ position was not standardized for all models. Hand-crank positions on other brands also vary.
 Removing the Power Carriage Motor
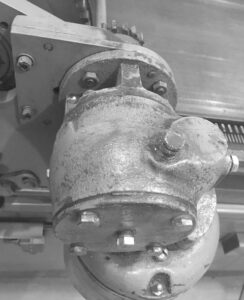
Removing the motor while the carriage remains on the press may be necessary, such as passing through a narrow doorway. It can be removed without disturbing the clutch:
- Remove the two socket head cap screws and shimmy the motor plate off the alignment pins on the side plate. Doing this also separates the motor gear from the cylinder gear and passing the gear shaft from the circular notch in the side plate.
- Cushion motor and secure on the bed.
- If the carriage is removed, the motor can remain attached if the carriage is suspended by a hoist or is carefully packed for shipping.
