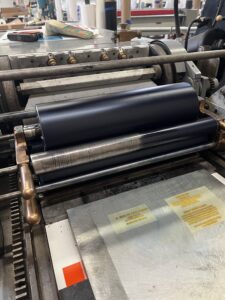
The rider rollers on my newly acquired Model 4 aren’t making even contact with the forms. On the front roller I can pass a piece of 12 pt card stock between halfway across the roller’s length. The back one is better but still light on the same (operators) side. The forms are accurately adjusted to .918. Their carriage blocks have been replaced with steel and nyliners. I thought that I might have a galley bed and the forms were too low in their carriage to make proper contact with the riders. But my .918 gauge measures slightly higher than the bearer rails (not to mention that my impression seems right). I have checked to make sure the the top carriage is laying evenly on both sides of the bottom carriage and that the oscillator moves freely up and down in it’s slots. The oscillator sets evenly on the forms and in fact I have been able to run a dozen jobs by passing the rollers over the form while off impression first. What I haven’t done is check the rider’s bushings as I have not been able to remove the taper pins. There is a little bit of play but it seems the same on both sides. I checked the play on another #4 that I used to run and it is the same. What’s most telling is I set my top carriage on the bottom carriage and it was the same. I’m thinking that the carriage is tweaked. I’m not sure how to confirm or how to fix it. Thank in advance!
Home

A proof press resource

Perhaps you do it this way, but I suggest starting over to set the roller height by assembling the bearing blocks in the frame:
near side set screw depth
far side set screw depth
near side
far side
Front support
support
Thanks Ernst. I did try to adjust these plates but it didn’t help. The rollers are too far away on the one side. While working on it today I found the issue. I haven’t been able to figure out how to fix it though. The forms seem to be accurately adjusted to .918 (I have adjusted rollers countless times over the past 50 years!). The reason the riders aren’t touching on one side is that the carriage blocks lower on one side by .100″. I checked to make sure that there’s no binding that’s keeping that side from dropping to the bottom of the front bottom frame support(?). I’ve included a pic because I don’t see this part in the parts list. I don’t see any way to adjust it up or down and the plate that it is attached to the carriage with 3 bolts and pinned.
david, there is one more adjustment you can try. it helped me to solve this problem. by moving the plate vertically (it has slotted holes) it centers the top unit with the rider rollers over the form rollers. check the picture. i replaced the slotted screws with allen head srews for easier adjustment.
Happy to see that you’re methodically investigating all of the variables. Please post a comment when you arrive at a solution. I see that I did add you to the census. I often forget names but remember their presses.
Thanks for your response Paul. I forgot to mention that the forms were newly covered by Advanced. The first thought was that they made a mistake on the diameter. They’re 2.5″. The steady rollers were completely disengaged when I got the press. I set them using a piece of .03 bond. I will take a closer look at what you have suggested. BTW-I contacted you about the census several months ago. You already updated it.
It might not be that the carriage is tweaked, but could be:
You didn’t mention the form rollers. Are they old? Is the diameter approximately 2.5″? The ends may be flared or shrunk.
Please tell me the serial number, where you acquired it and your location for the census https://vandercookpress.info/census/