
 This post explains how a draw sheet (the top sheet that keeps the packing in place) is properly installed.
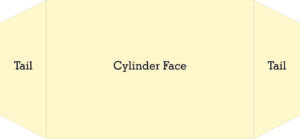
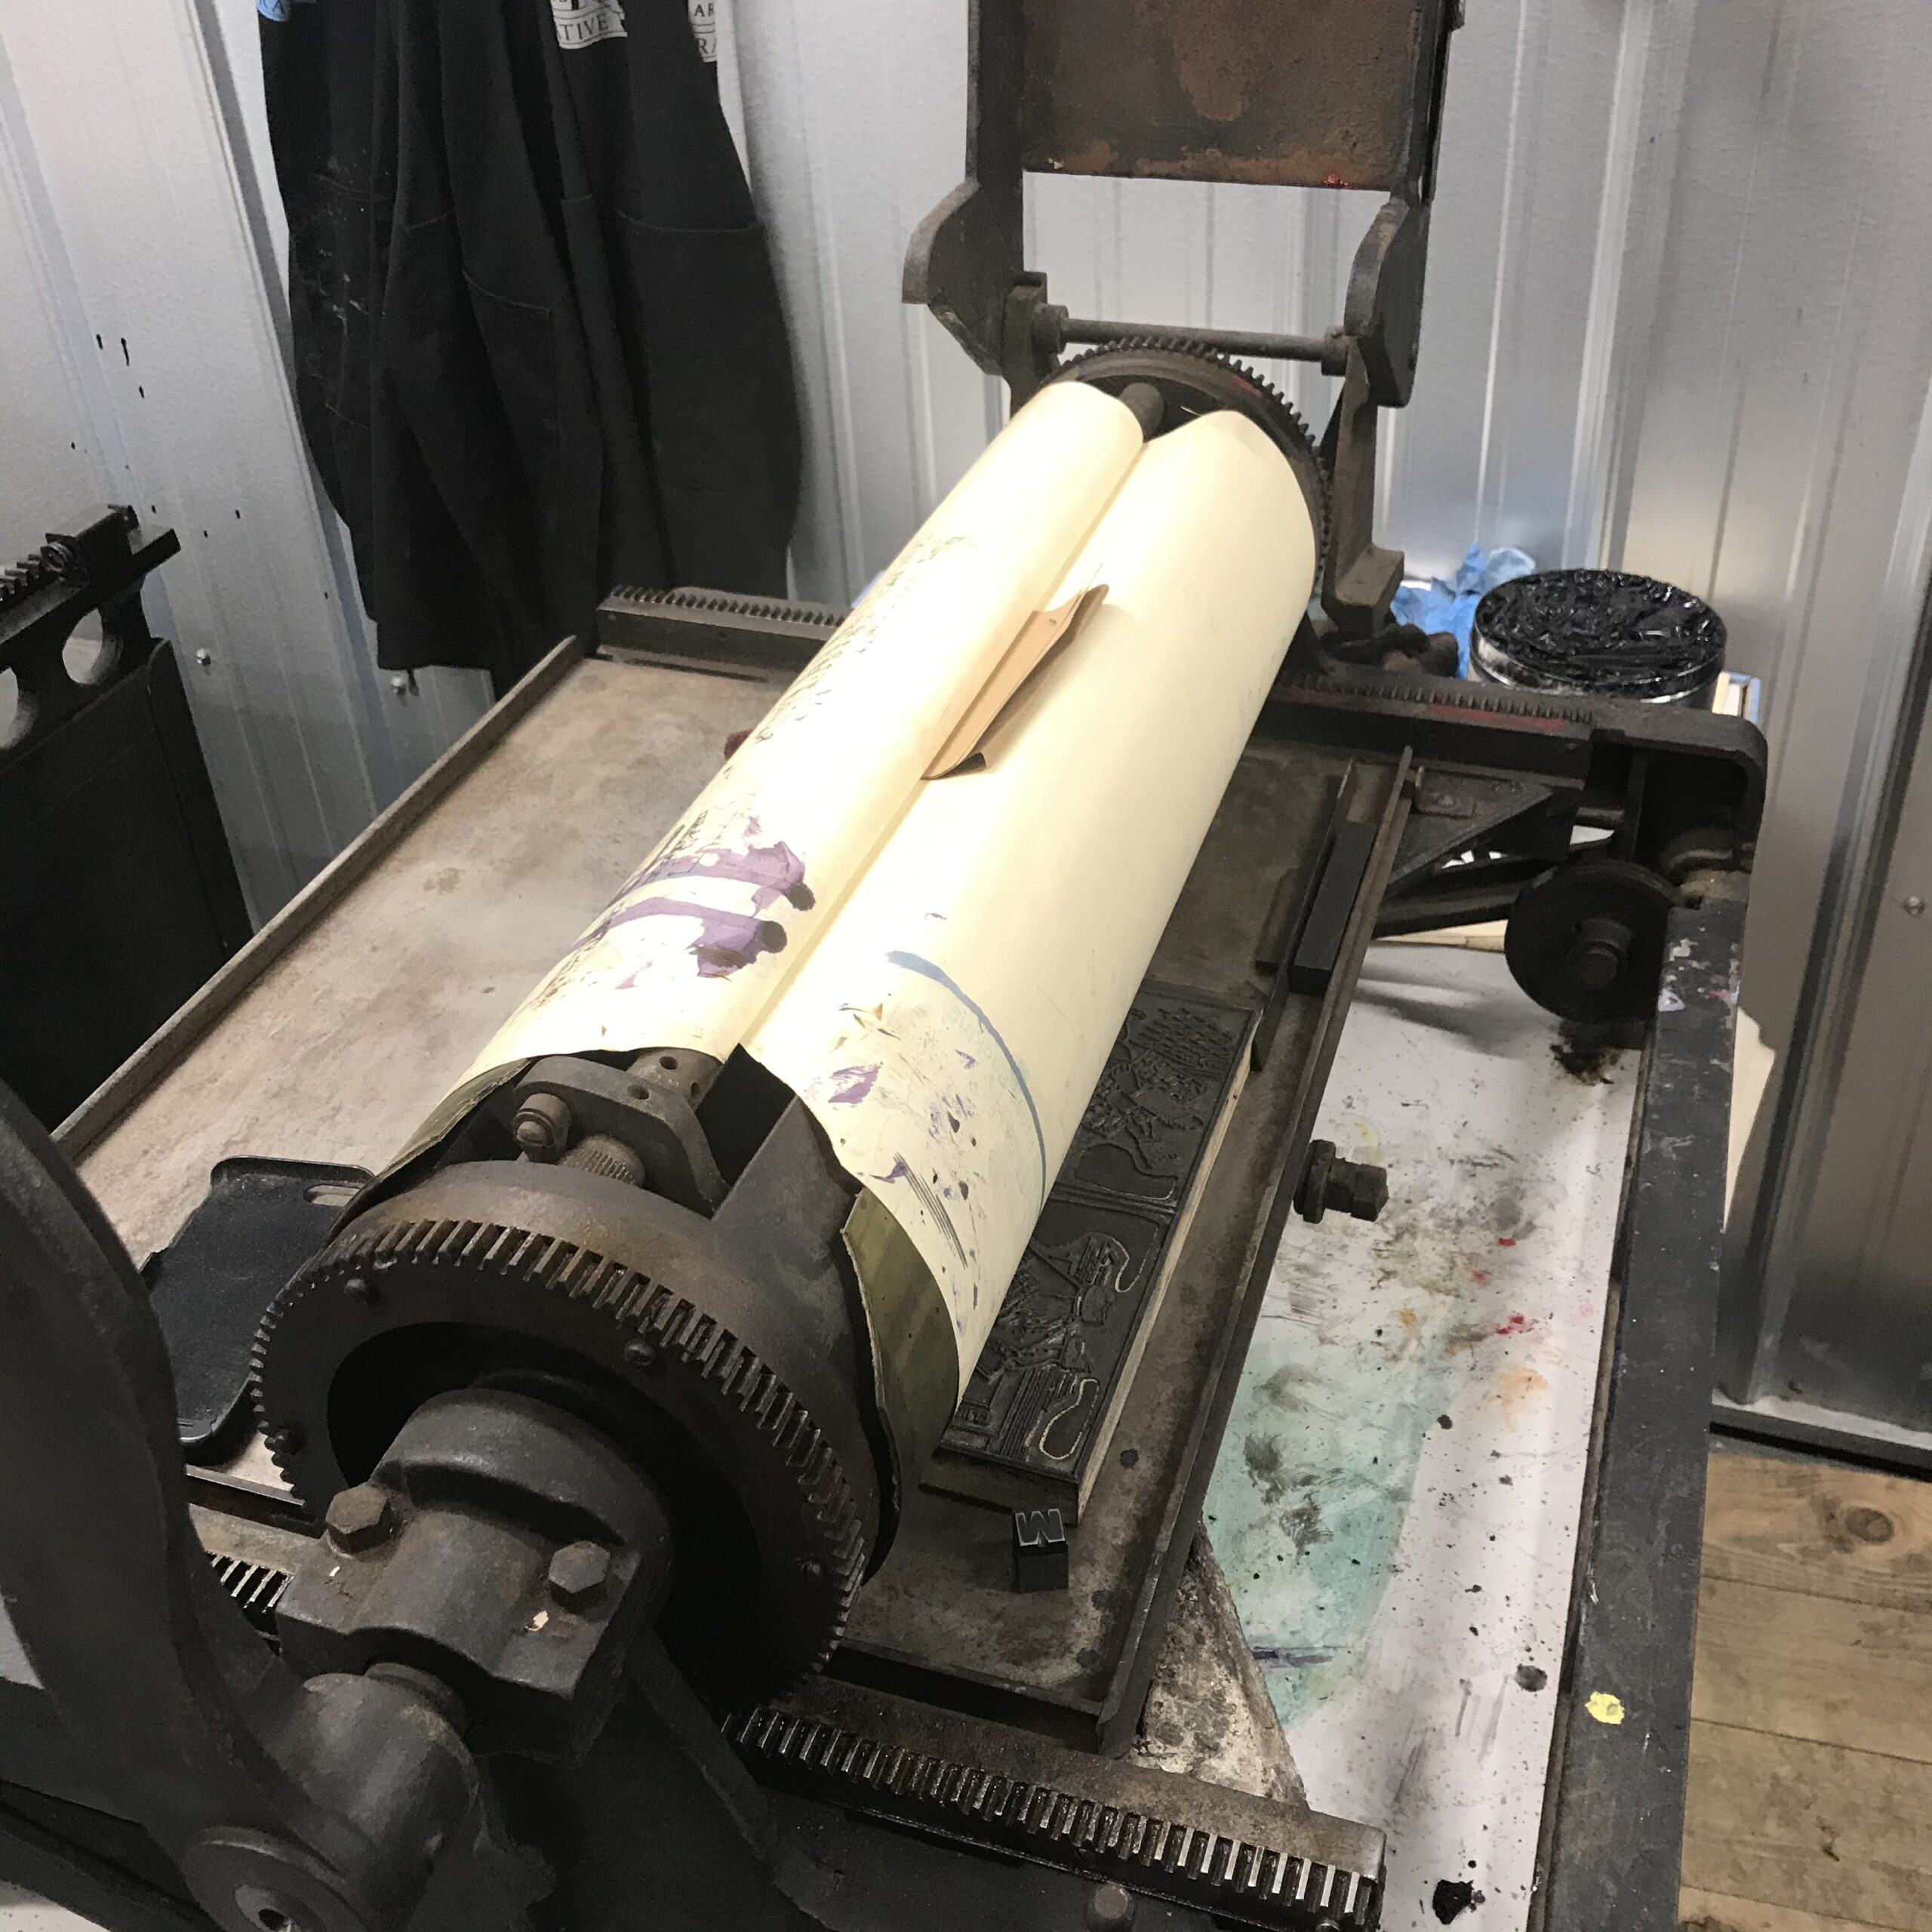
For the Model 0, a dimension of 12 × 26″ will cover the face of the impression cylinder (18″ long) and two tails (4″ long) on each end to be inserted into the reel rod. The exact length and angle of the tail can vary.
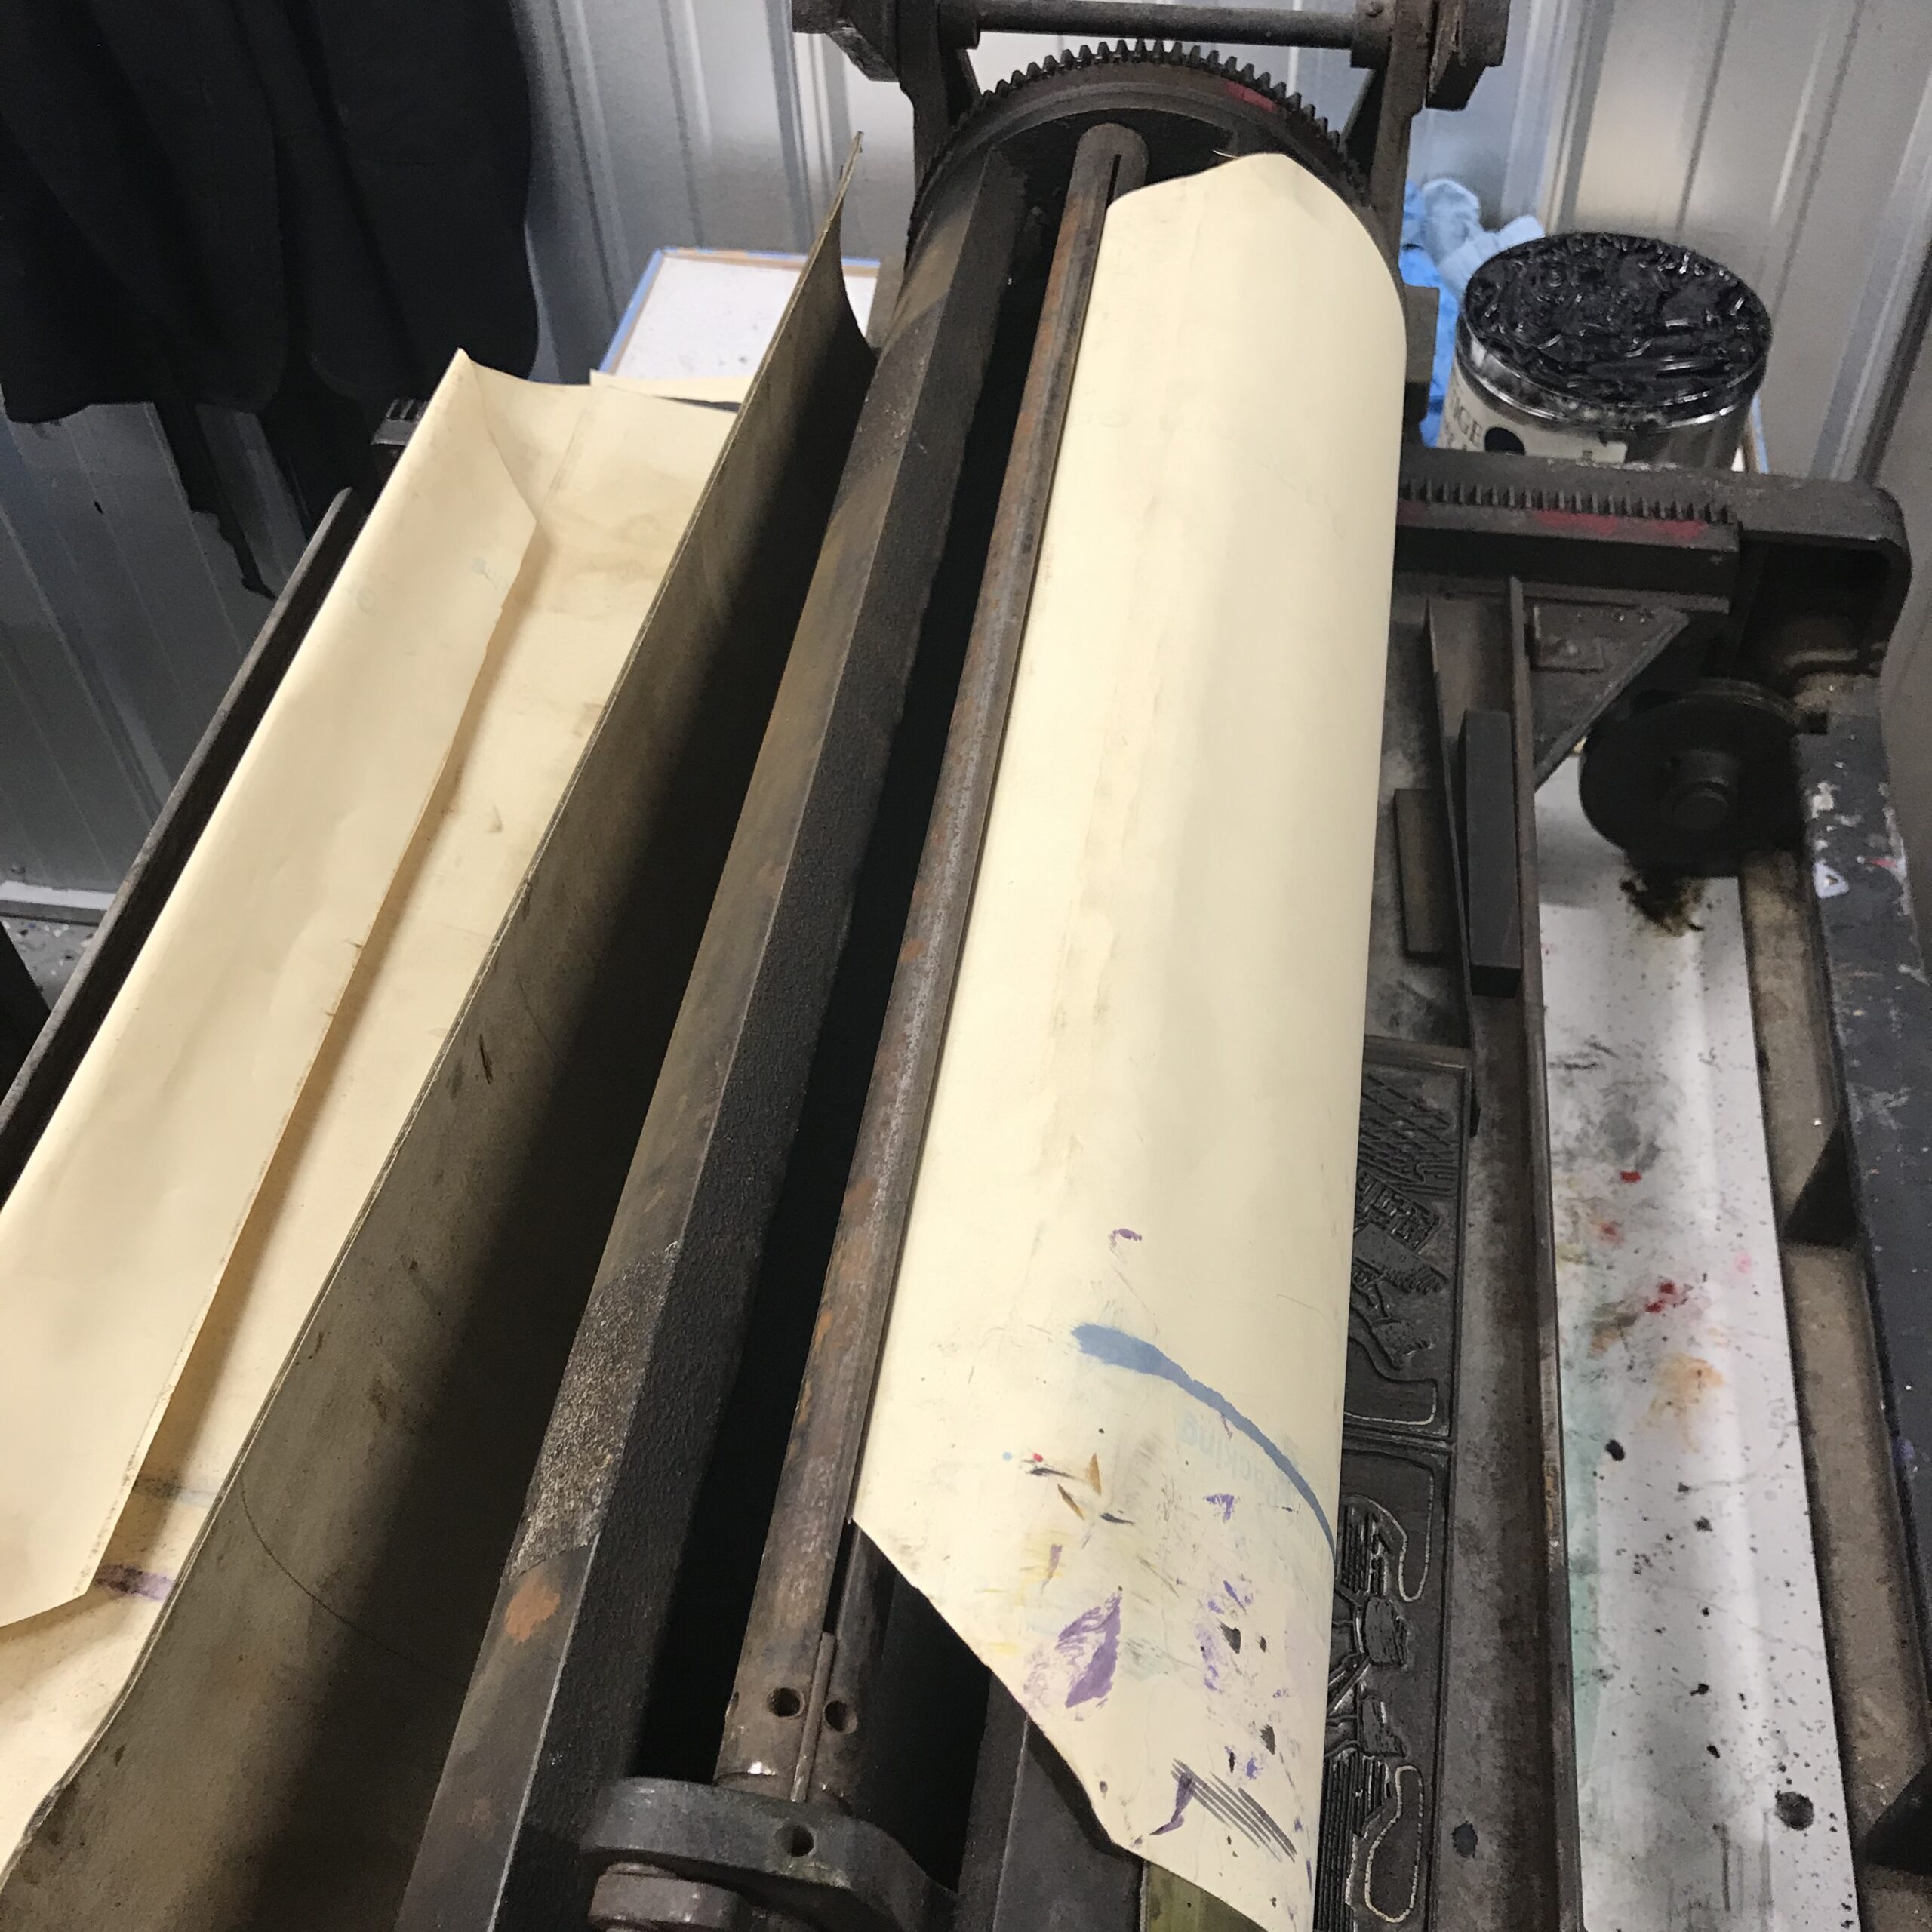
- slip the draw sheet under the cylinder
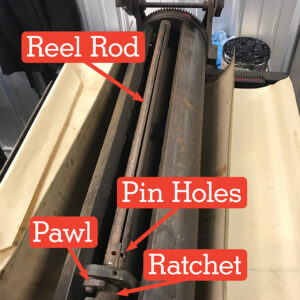
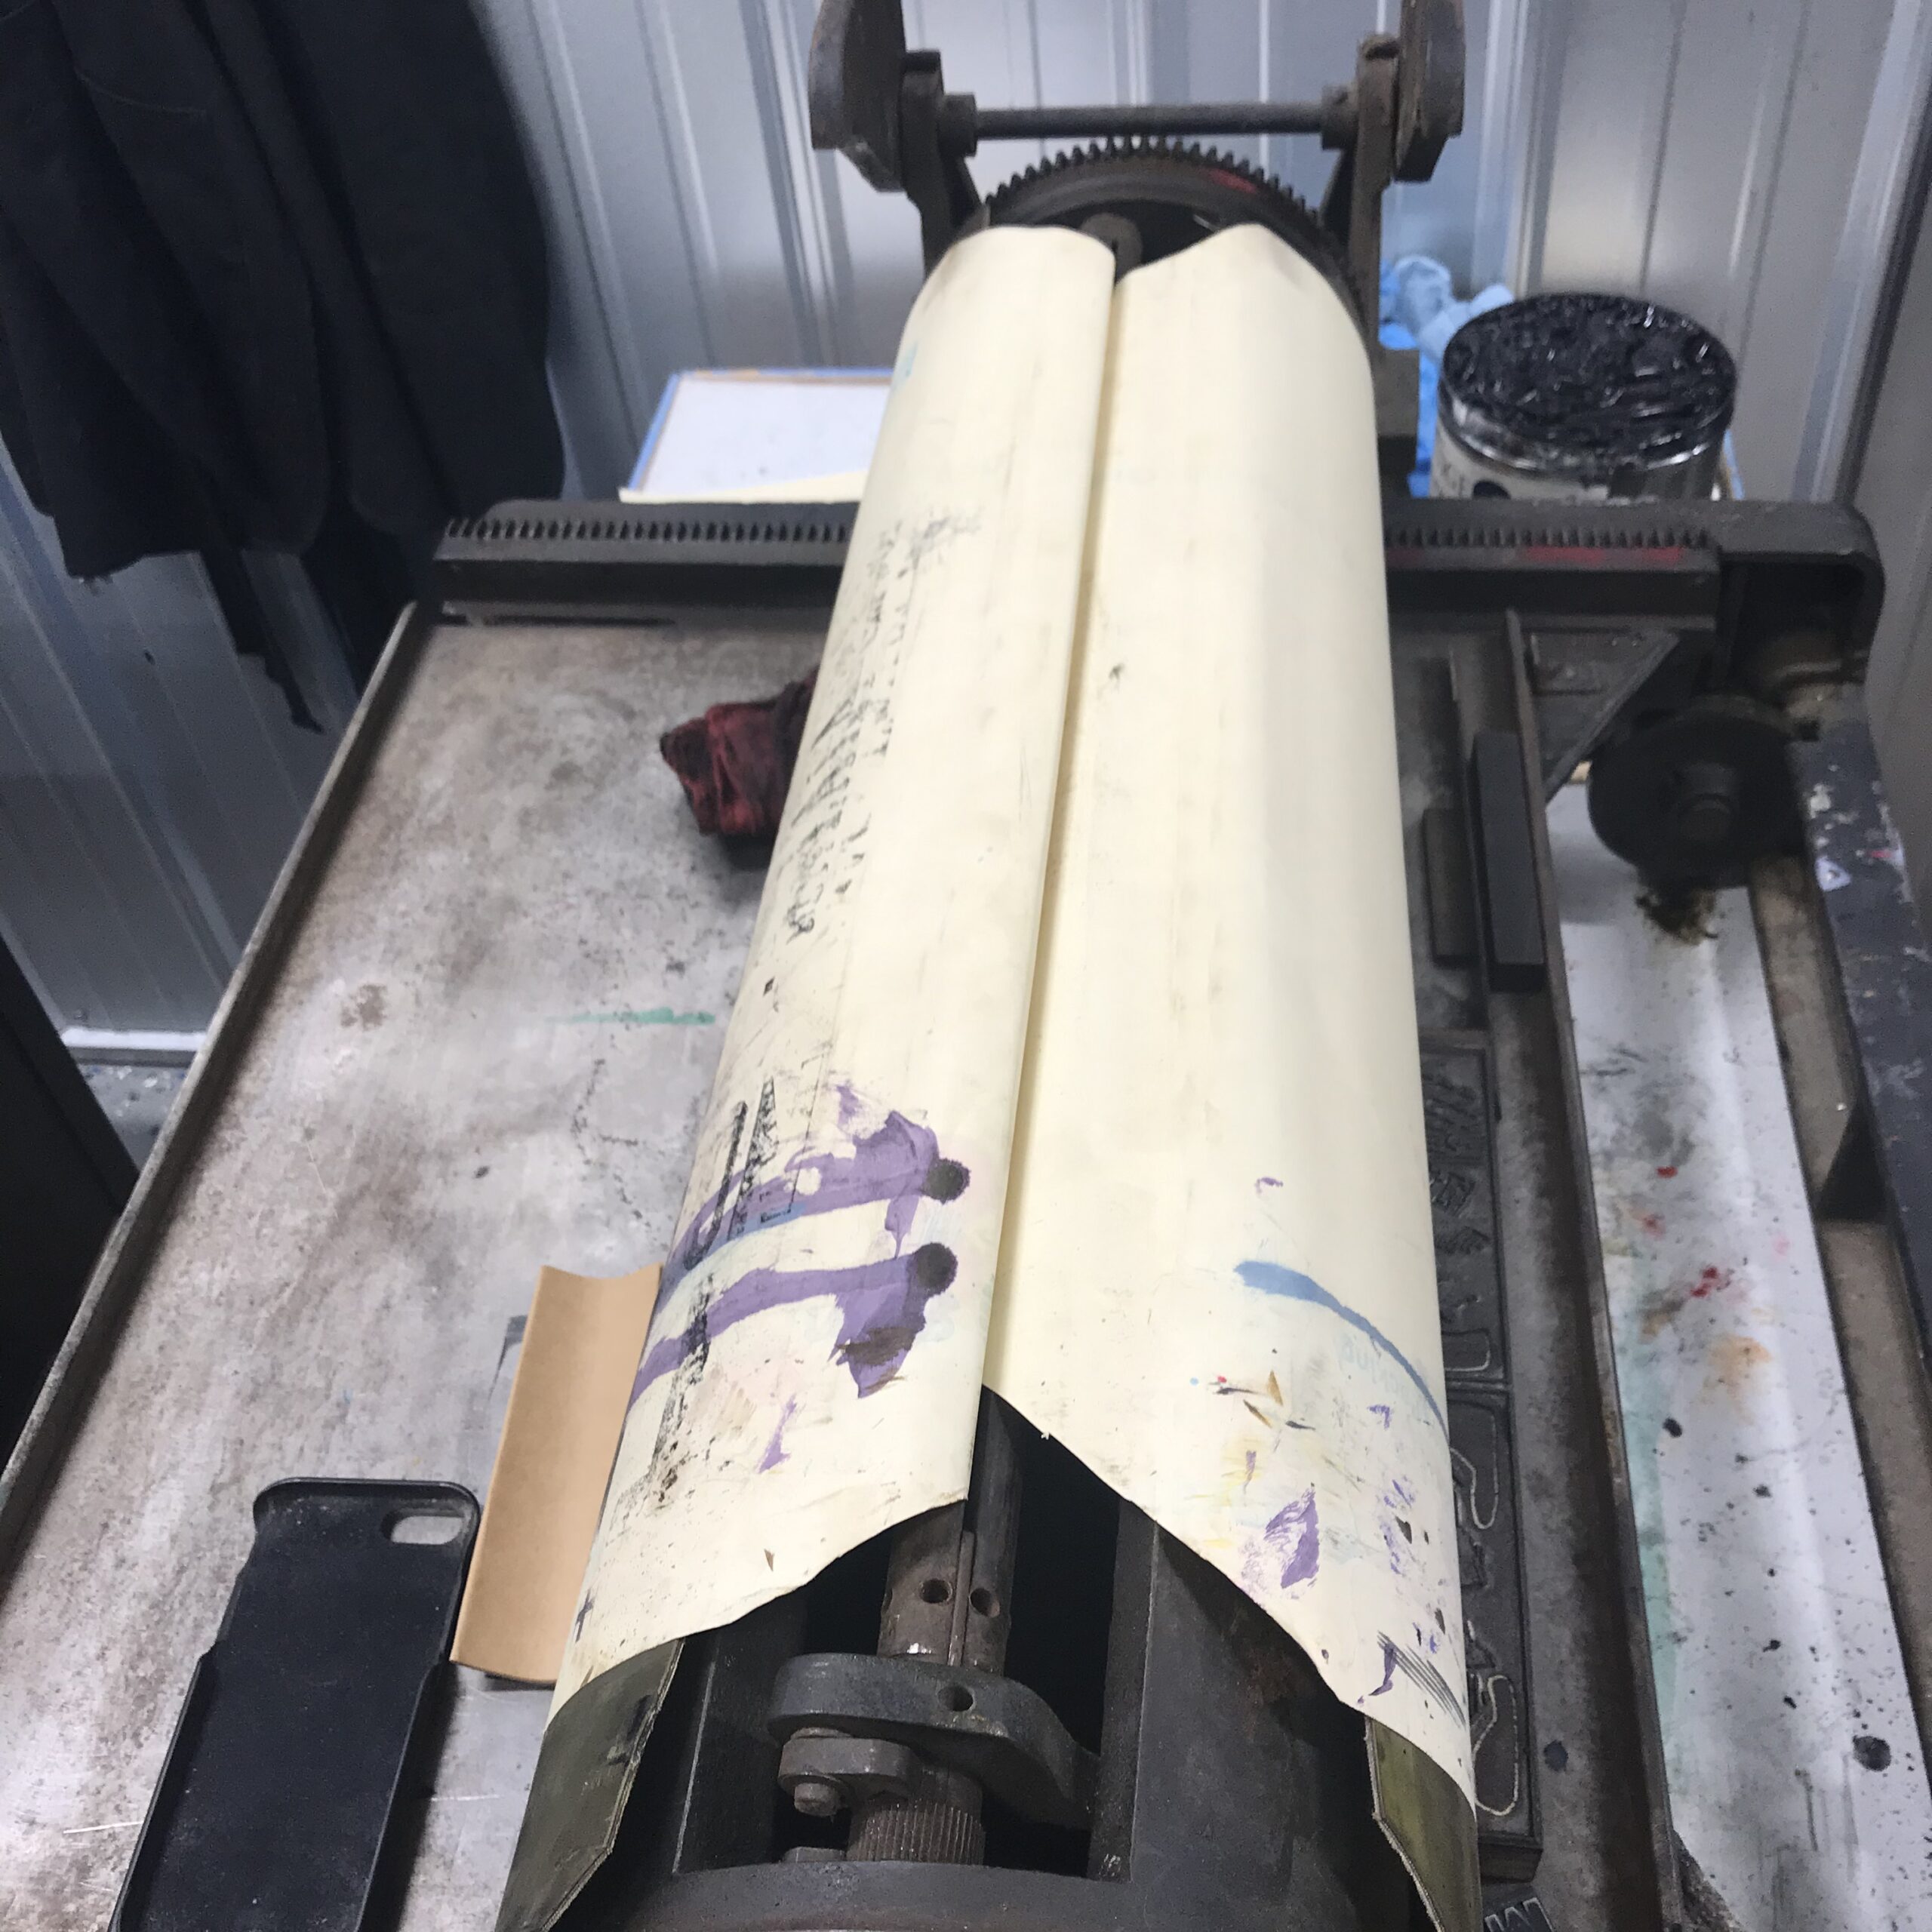
- insert the tails into the slot on the reel rod
- a bit of folded cardstock can be used as a wedge to keep tails in place
- make sure ratchet and pawl are engaged
- insert a pin wrench or Phillips screwdriver into one of the holes next to the slot, move the wrench to the next hole as the drawsheet tightens
(Photos courtesy of Rob Miller/Tribune Showprint)
For other models, consult the table on the main Poco page, which shows the sizes of the bed for each model. That information corresponds to the surface area of the impression cylinder. Minor adjustments may be necessary because the width of the drawsheet should not extend into the channels on the impression cylinder that separate the cylinder face from the cylinder bearers (the bands next to the cylinder gear) that roller on the bed bearers (rails) on both sides of the bed.
The amount of cylinder packing under the draw sheet is relative to the cylinder undercut, which is how much lower the bare impression cylinder is in relation to the cylinder bearers. The Poco undercut is .050″. The amount of packing material needed (including the draw sheet) is relative to the undercut, the thickness of the paper to be printed, and the depth of impression desired.