
Hello all,
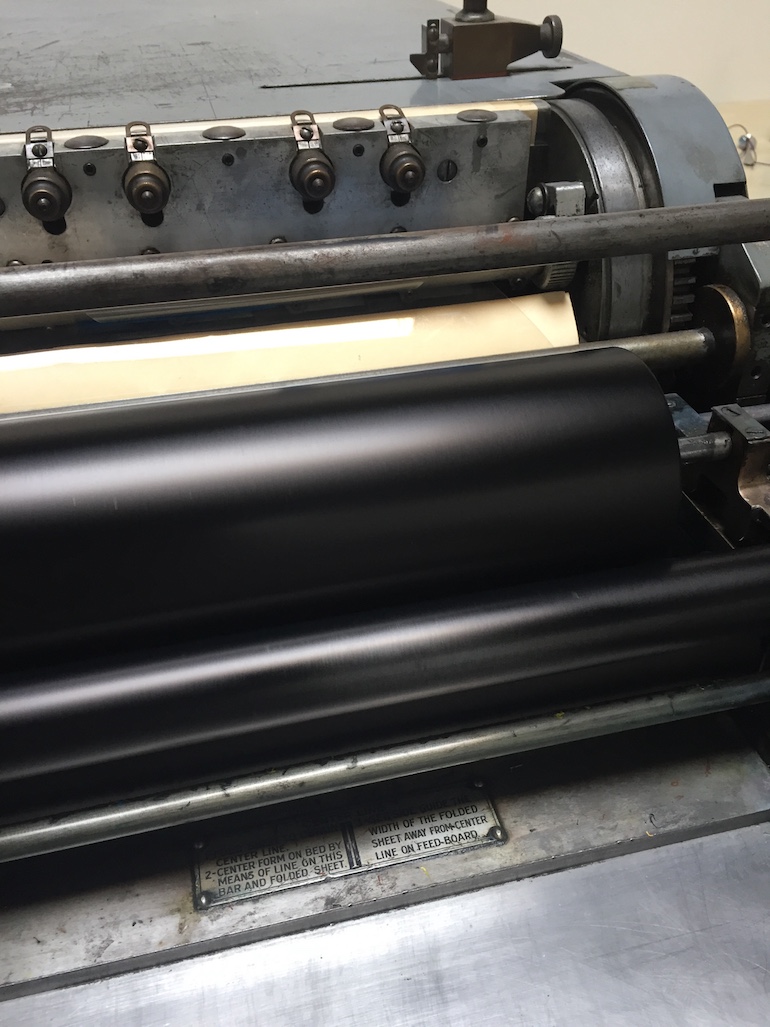
I’m trying to troubleshoot an inking problem on my Vandercook No. 4, Serial No. 14509. I’m finding that my rider rollers (the small steel rollers front and back) are not getting inked evenly. (See image, the front rider roller is not completely inking towards the right side)
When I roll the cylinder down the bed, I see shiny or bare patches indicating the rollers aren’t making contact. If I’m standing at the end of the bed, this is happening on the front rider roller’s right side, and the back rider roller’s left side. If I press down on the roller assembly handle gently, I can sort of “manually” correct this but I’d like to figure this out.
- The ink drum seems to be inking evenly and there’s no play in it
- The form roller’s heights are even and correct according to my gauge. I have nyliners in place.
- The roller assembly seems to be in good shape, very little play there.
- My rollers are about 5 years old, I keep them covered when the press isn’t in use, but it does get hot/cold in here…The rubber’s in good shape, but I do see flaring at the ends.
- I’m the sole operator of the press so I know the steel roller frame hasn’t been dropped/bent
Is it just my rubber roller’s flaring causing this? Do I just need new form rollers or is there some adjustment I am missing?
Thank you!
My experience with the inking rollers flaring on each end is that when the rollers are covered they are generally covered end to end. If you watch the action of your oscillating roller it does not go all the way to each end therefore as it runs day in and day out it tends to compact the space that it runs on and that part get smaller while the ends where the oscillating roller does not roll tend to stay larger. Now if you look at the rider rollers they do fit all the way across the inking rollers so as the center of the inking roller shrinks the rider rollers tend to not ink well in the center. This can be eliminated when you get your rollers recovered by having the roller covering company bevel the ends of the rollers so that the oscillating roller will go all the way end to end and not create the shrinking in just the center but more evenly all the way across. Paul may be able to give more exact dimensions of how far the oscillating roller does travel and therefore how far to make the bevels so you get as much ink width as possible but help eliminate this problem.
Maintaining parallelity is the reason for the primacy of diameter over durometer. On framed assemblies, each component of the bottom frame (roller cores to tie rods, bearing bars to frame handles) must be parallel to each other and then parallel to the top frame (oscillator, riders, and tie rods).
Thank you Paul, I checked the the rollers and they do seem to have hardened up a bit. Also, it completely makes sense that the diameter would be more important on the framed assemblies which rely more on gravity, I never thought of that, thank you for pointing that out. Well, time to start saving up for new rollers!
Best,
Marianne
Flaring is a good indicator that it’s time for new rollers. At the ends, the diameter may be close to the spec, 2.5″ for your press, but is obviously less at the low spots. Diameter is more important than durometer (hardness), especially on presses with framed assemblies like the No. 4.
Still, keep in mind that rubber hardens over time and after five years and the durometer may not be at spec of A20. You don’t need a gauge just check if they are pliable by squeezing or pressing a ballpoint pen into the surface and note if the indentation quickly disappears from the rubber surface. I have seen harder rollers A30-35 transfer ink properly if the diameter is uniform.
Purchase new rollers and printing will be easier. New Rollers Day is a high holiday in my shop.